Firstly we made the canvas size 230 pixels by 700 pixels.
Then we fill the canvas with #A08038
Next we go to filter> noise> add noise.
Make the amount 60 and check Gaussian and monochromatic.
Then we add motion blur with an angle of 90 and a distance of 30.
Next we go to filter> render> clouds.
then we make the blending mode vivid light.
After this we merge the layers and then make an oval selection and go to select> modify > feather and make the radius 15.
Next we go to filter> distort> wave and click randomize until you find a something that looks like a knot in the wood. repeat the process again.
Then we go to filter> distort> twirl with a setting of -25.
Then again we go to filter> sharpen> unsharpen mask with settings of 65, 3.3, 0.
Then you have a wooden plank.
We created a video tutorial on how to create a texture using Camtasia. In this tutorial I created brick wall texture.
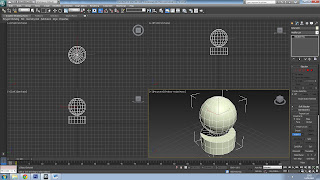
Here I created three shapes; pyramid, sphere and a rectangle.
After we created the shapes, we applied textures.
Our next tutorial was creating a wine glass. We started this by drawing a shape on the left viewing port.
After we drew the outline, we went to the modifier list and chose lathe which created the glass.
Next we added a plane under the glass so when we applied the texture, we would be able to see it.
To make the glass texture we went to material editor, clicked on the small box next to diffuse and clicked on Raytrace.
we then dragged the texture to the glass we made and rendered it so we could see the texture.
In this tutorial, we learnt how to attach shapes together. Firstly we created a cylinder with two height segments and two cap segments.
Then we converted it to an editable poly.
Then we bought up the grid ans snap setting and checked vertex.
After we completed that, we added a sphere and moved it down so it is align with the cylinder.
Then we rotated it so the segments of the cylinder and the sphere were in line with each other.
After the were aligned, we moved the sphere up so it was above the cylinder and attached the two shapes together.
After they had been attached, we the cut half of the sphere away.
With the cylinder, we then held down ctrl and clicked all of the segments that were directly underneath the half cut sphere and deleted them.
After we had two cut shapes, we selected the border of the cylinder and the sphere and bridged them together.
I repeated the process with more shapes to help my memory and skill develop.
The tutorial we were given was on how to create a cage with a ball inside of it.
Firstly we made a plane, box and a sphere. The sphere is small and is in the middle of the box.
Next we added a background and added a chequer texture to the plane.
We then gave the box three segments for the length, width and height. With the box still selected, we then went to the modifier list and chose lattice.
After we did this, we experimented with settings, the amount of segments and the Y and X axis.
After, we completed the settings, we added a spot light directly on the ball in the centre of the cage. I then added a chrome mirror texture to the ball.
Here I have done some experimentation.
This is the finished piece without any experimentation.
Firstly, we saved two PSD files of the texture, one called map and the other main. Then we add a new layer and fill it with black and add a white text.
Next we convert the text to a smart object and clip the texture and the text together by holding alt and clicking between the two layers.
Next we go to filter>distort>displace and check the wrap around option and make the scaling five for horizontal and vertical.
After this we add effects like bevel and emboss, drop shadow and texture.
Then to finish it off, we added a layer mask and used a one pixel brush.
Demo
Today, we were given a demo on how to make a ball with circles embedded in them.
We used the extended primitives, the shape hendra and selected dodec from the family settings. and changed some of the settings so it turn't in to a pentagon
We then selected all of the faces when in editable poly.
Next we selected the inside of the pentagon and moved it in and extruded the pentagon in to the shape.
We then went to the modifier list and selected turbo smooth which rounded it all off and made it a ball.
We then changed some of the settings to refine the shape and added a texture.
Football
Today we followed an online tutorial to create a football using the same techniques as the previous shape created.
Here is the link to the tutorial I followed to create the football in 3DS Max.
Today we were given an image of a shape created in 3DS Max and told to re-create it.
Here is my experimental piece of the original image.
I want to make my final creation better by making proper wheels for my model, I experimented and made this tyre and wheel.
I made an attempt on creating a tyre for my car model.


No comments:
Post a Comment